
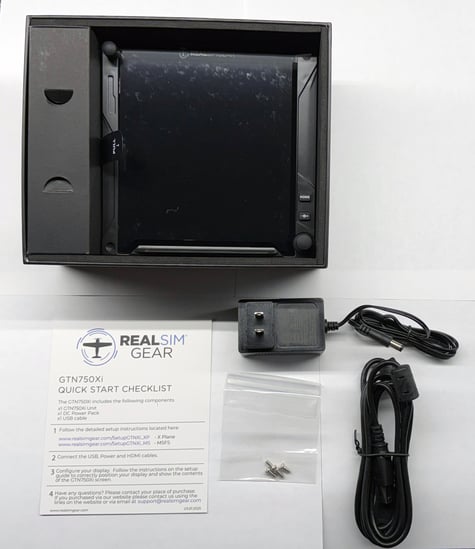
GTN750Xi Package Inclusions:
-
One: Quick Start Guide.
-
One: RealSimGear GTN750Xi.
There will be and additional small box inside the GTN750Xi box containing:
-
One: 12V 2.0 Amp DC Power Adapter with a 5.5mm x 2.1mm barrel connector. (North America socket pattern).
-
One: USB A to B cable.
-
Four: M3 x 6mm Phillips head mounting screws.
Mounting your GTN to a RealSimGear Desktop Stand:
The RealSimGear GTN750Xi can be mounted in a number of ways. The most common method of mounting will be through the use of a RealSimGear Desktop Stand (Sold Separately).
Included with your RealSimGear GTN, will be a small plastic bag containing four, M3 x 6mm mounting screwa. These four screws will be used to secure the GTN to the stand in the four holes depicted in the images below.
For maximum compatibility, the RealSimGear GTNXi devices will utilize the same mounting holes and cutouts as our previous generation of GTN devices.
Note: Install the screws with a hand screwdriver (#2 Phillips Head). Overtightening the screws can strip the mounting holes.
GTN750Xi
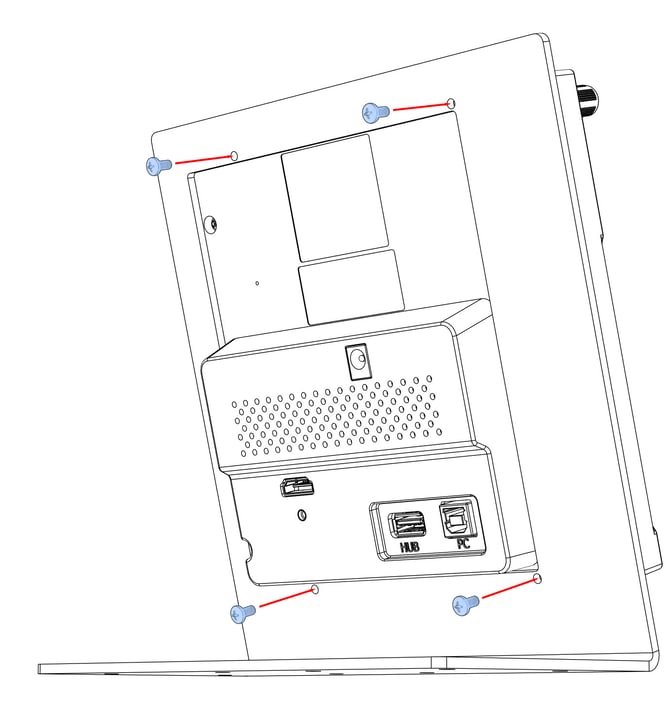
The images above show the GTN device being mounted in a single device mount. If you have purchased a GTN combination mount, the method of installation will be the same, as the cutout patterns in the combo stands are the same as the single device stands.
Install the RealSimGear Plugin:
You will need to download and install the current version of the RealSimGear Device Interface for Microsoft Flight Simulator 2020/2024.
Note: By default the RealSimGear Device Interface for Microsoft Flight Simulator 2020/2024 allows control of the PMS50 GTN software.
If you are using the TDS Simulations GTNXi:
You need to choose the "TDS GTN Configuration" from the dropdown menu in the "Choose Components" dialog of the RealSimGear MSFS Plugin Installer.
More information is available in the: RealSimGear MSFS Plugin Install Guide
Connect the cables:
Connect the cables in the following order:
-
USB A to USB B: Connect the square Type B connector to the back of the GTN and the rectangular Type A connector to an available USB port on your PC or Powered USB hub.
-
HDMI: You will need to supply one HDMI cable (not included with the GTN), to connect from the GTN to your PC's graphics card or RealSimGear USB3 to Dual HDMI Adapter. If you are connecting directly to the graphics card, it is acceptable to use a good quality DisplayPort to HDMI cable.
-
12 Volt DC Power: Plug the barrel connector into the GTN unit, then plug the adapter into an available wall outlet.
For international customers: you can use an outlet adapter to adapt the North American plug style to your local plug style. Additionally you can also purchase a dedicated DC adapter to your plug style from a local electronics retailer.
Configuring the Display and Touch Screen:
With your GTN now connected to your PC and powered on, you will need to configure the screen settings and let Windows know that these devices have a touch screen.
Windows Display Configuration:
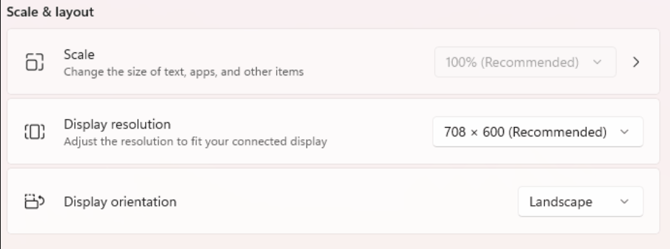
GTN750Xi: Resolution of 708x600 @60Hz with the orientation set to "Landscape"
Touch Screen Set Up:
We have created a full guide on the process and steps needed to fully configure the display and touch screen in the article linked below:
RealSimGear Touch Screen Setup Guide
With the display configured in Windows and your touch screen mapped with Windows Tablet PC Settings you are now ready to proceed to Microsoft Flight Simulator and continue to configure your avionics.
Install GTN Avionics for Microsoft Flight Simulator 2020/2024:
If you have already installed the TDS Simulations GTNXi Pro for Microsoft Flight Simulator, you may scroll down to the "Configuring the GTN Hardware for Use With MSFS" section of this guide.
For the purposes of this guide, and what RealSimGear recommends for use with Microsoft Flight Simulator, we will show the setup of the TDS Simulations GTNXi Pro software.
The TDS GTNXi Pro for Microsoft Flight Simulator is a fully featured GTN software package that utilizes the Garmin GTN PC Trainer as a base for it's simulation. It is also fully updatable with Navigraph for navigation databases and onboard charts. The TDS Simulations GTNXi package also includes the software for both the 750 and 650 variants in one package.
You can purchase the TDS Simulations GTNXi Pro for MSFS here: tdssim.com

Installing the TDS GTNXi to your PC:
- After purchasing the TDS Simulations GTNXi for MSFS, log into your account at tdssim.com
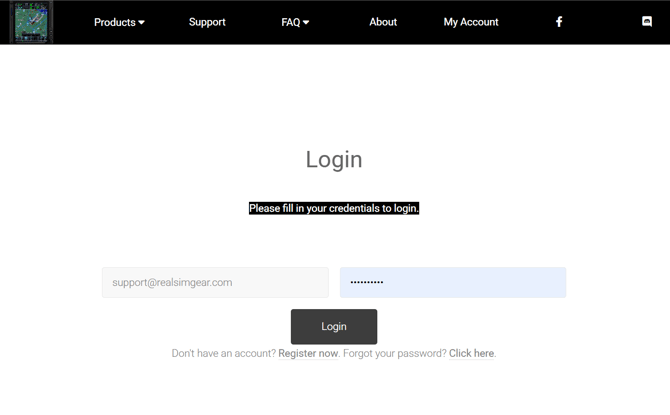
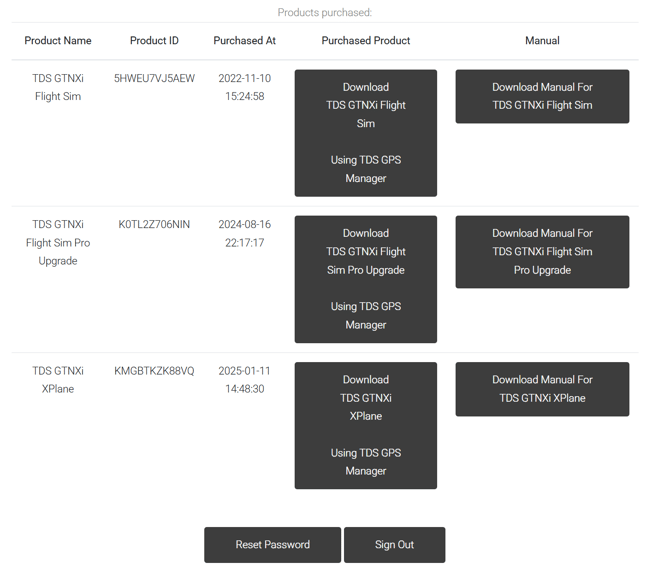
- Once you have logged into your account you will be presented with a history of any software you have purchased from TDS Simulations. You will need to download the TDSGPSManager.exe program from your account. We also recommend downloading and reading through the TDS GTNXi Manuals for Microsoft Flight Simulator which will give you additional information for the configuration of the avionics.
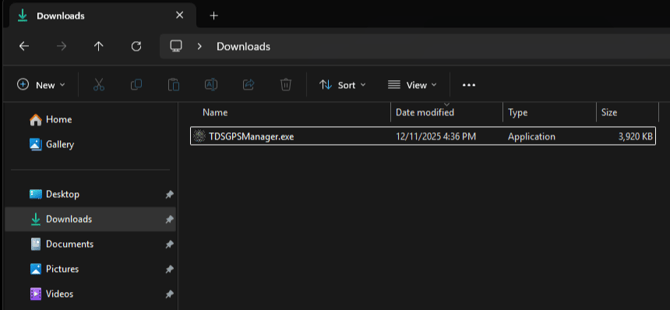
- Once you have downloaded the TDSGPSManager, navigate to the location your downloads are stored on your PC and run the TDSGPSManager.exe program.
- Windows will present you with a protection warning regarding the TDSGPSManager program:

- Click "More info", then click "Run anyway":
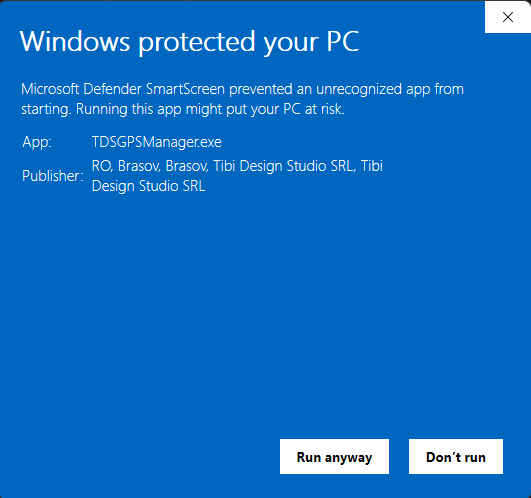
Note: The TDSGPSManager does not contain a virus or malware. This warning is presented as the program is not digitally signed for Windows and is a normal warning for unsigned applications in Windows.
- Once the TDSGPSManager has loaded, you will be prompted to log in using the same information you provided to access your account at tdssim.com:
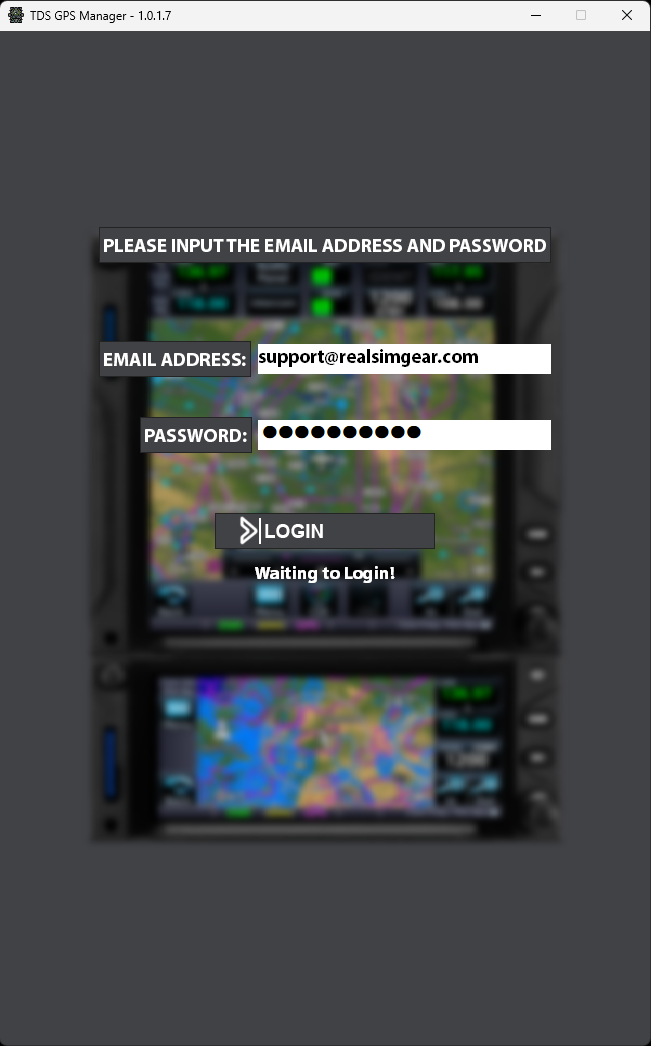
- The TDSGPSManager is the program you will use to install all of the necessary software for the avionics to function and you will use it to provide any future updates to the software package.
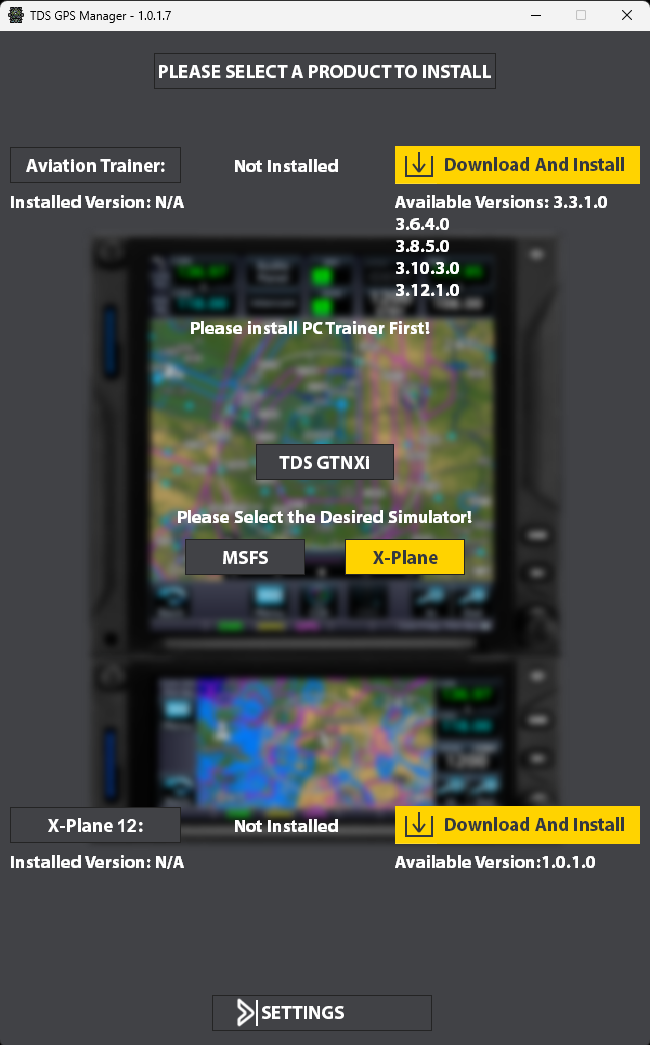
- The first component that needs to be installed is the Aviation Trainer.
- Click "Download And Install" for the Aviation Trainer.
- You will be presented with the following page on the TDSGPSManager:

- Choose only the "Recommended" PC Trainer Version. (this will maximize compatibility between the trainer and the plugin)
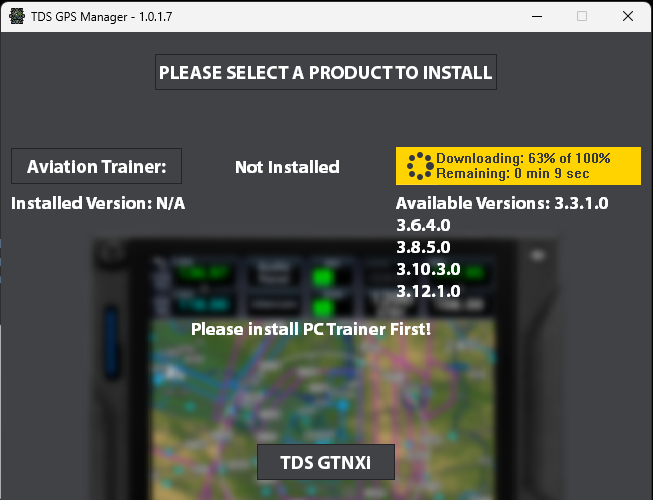
- The TDSGPSManager will switch back to the installation page and provide you a progress on the download of the trainer. Download time will vary depending on your internet connection:
- The Garmin Aviation Trainer installer will automatically open:
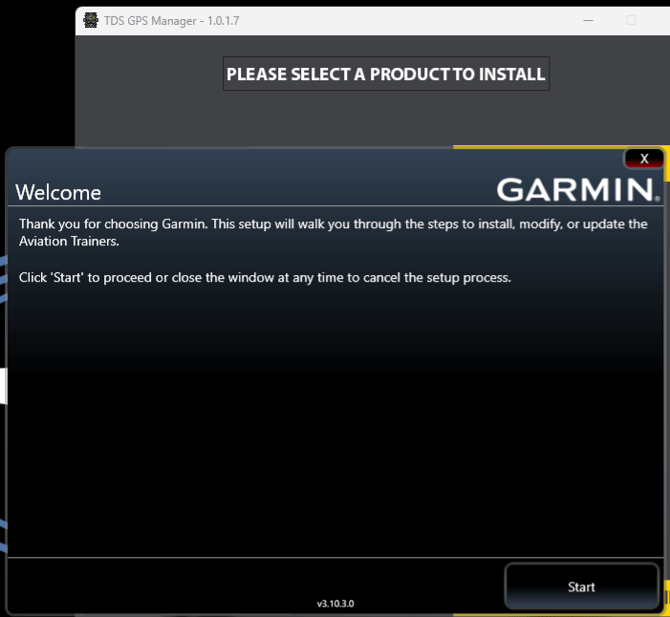
- Click "Start"
- You will need to accept the terms of the Garmin Aviation Trainer License Agreement:
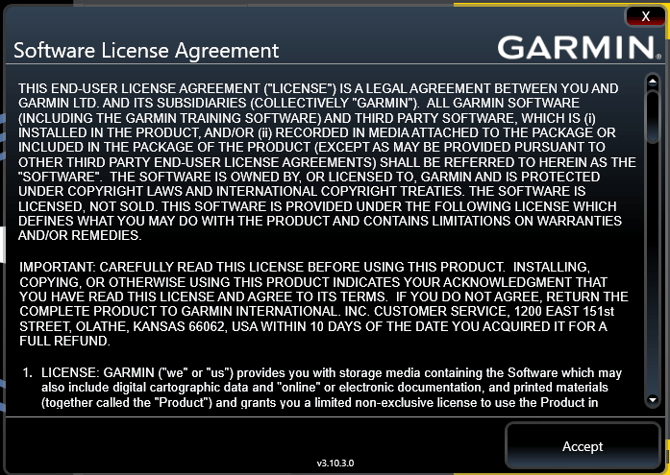
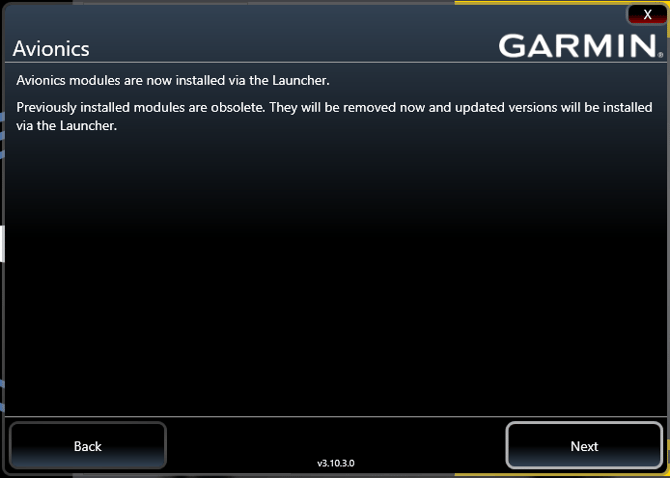
- Click "Next" on the following prompt:
- You will be prompted to choose any advanced installation options, such as where you would like to install the data for the Garmin Aviation Trainer. For the purposes of this guide we are installing to the default location:
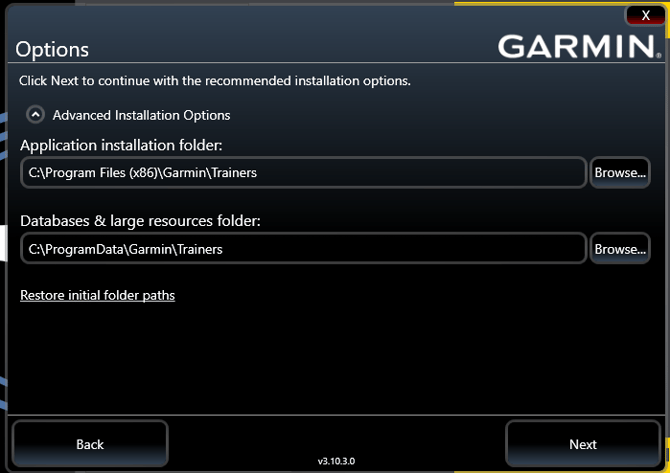
- Click "Next" on the options page.
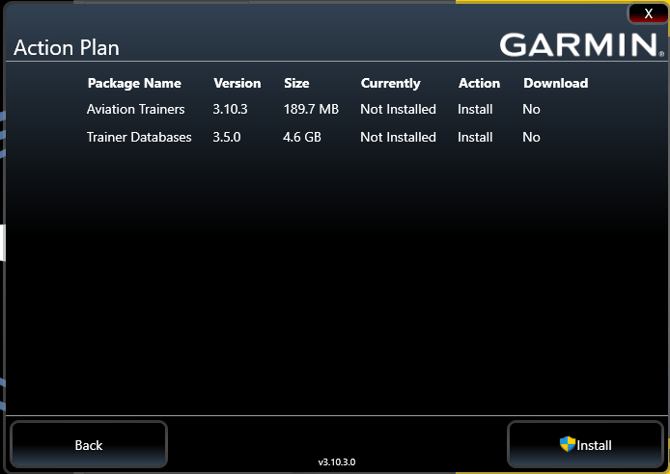
- The installer will now tell you what it will install and give you the option to start the installation.
- Click "Install"
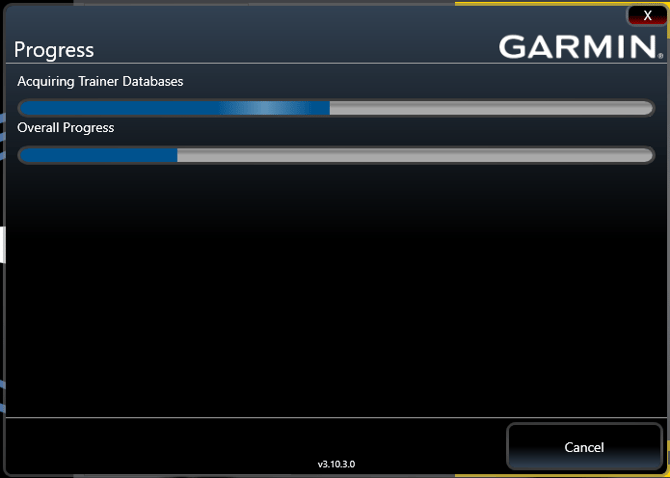
- The installer will then process the installation of the Aviation Trainer:
- When the installation is finished you will see the following prompt (minus the yellow arrow):
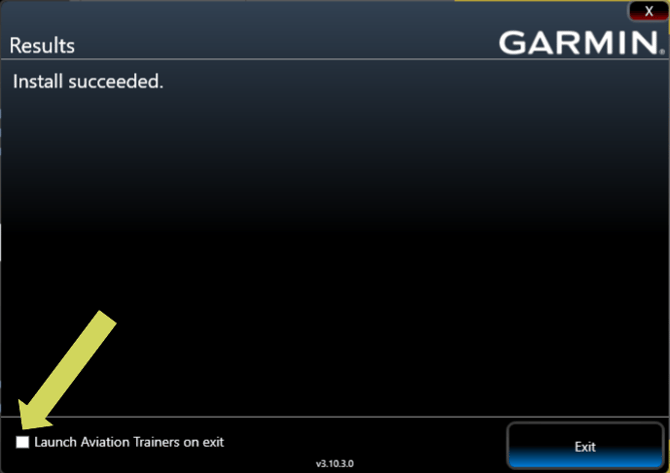
- Uncheck the option to "Launcher Aviation Trainers on exit"
- Click "Exit"
WARNING: It is highly advised not to open or launch any of the Garmin Aviation Trainers. Making changes to the Garmin Aviation Trainers will likely result in the TDS plugin within X-Plane providing a black pop out or cause errors in it's operation.
- Once the main Garmin Aviation Trainer has install, the second half of the Garmin Trainer will start automatically. This is the GTNXi Trainer required to run the TDS GTNXi in X-Plane.
- Choose "Start Install" on the following prompt:
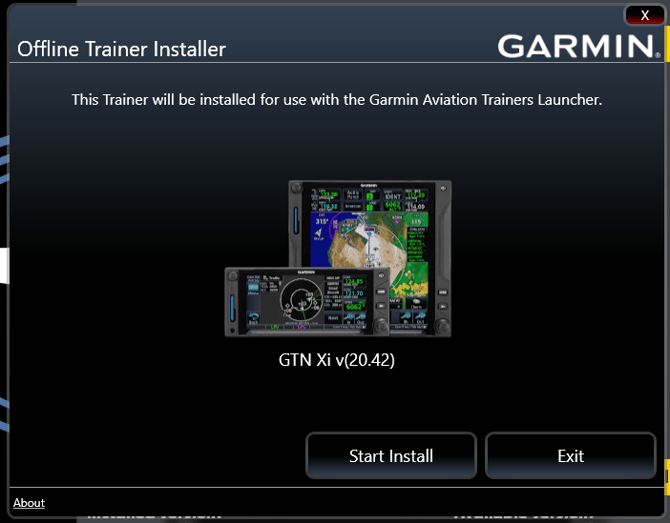
- Allow the GTN Xi Offline Trainer Installer to process.
- When complete you will be prompted with the following (minus the yellow arrow):
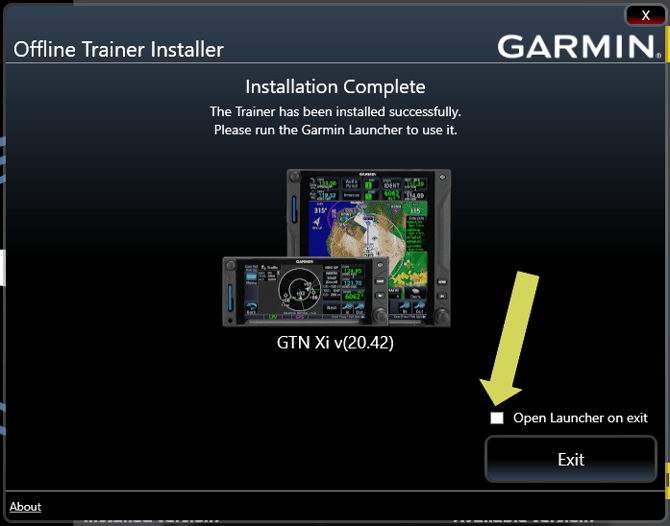
- Once again, Uncheck the option to "Open Launcher on exit"
- Click "Exit"
- The TDSGPSManager will provide confirmation of a successful install of the PC Trainer:
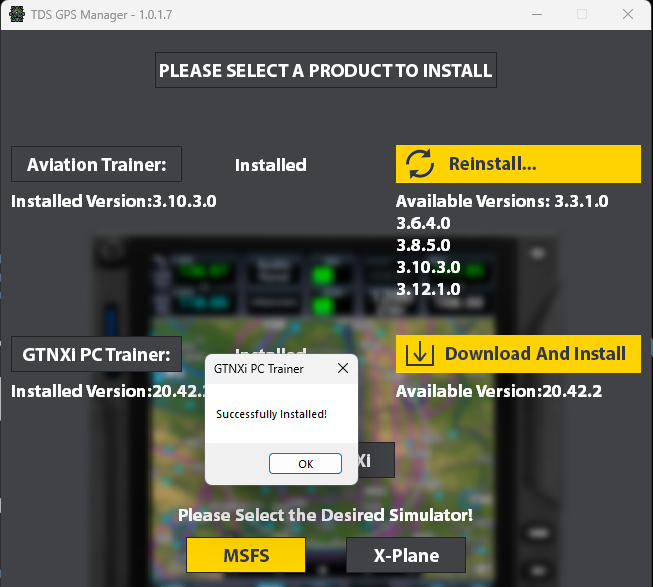
Note: You may opt to update the "GTNXI PC Trainer" to the highest available version offered.
The last component to install is the actual plugin for Microsoft Flight Simulator.
- Select the desired simulator (if you have both X-Plane and Microsoft Flight Simulator installed on the PC)
- Click "Download And Install" to install the plugin to your desired version of MSFS:
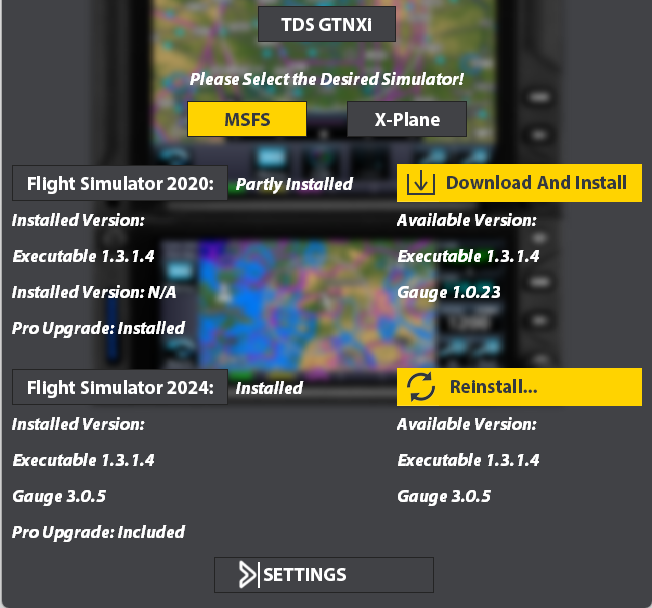
- The TDSGPSManager will also give you a confirmation that the plugin is installed into MSFS. Once this is complete, you are finished with the installation process of the TDS GTNXi software into Microsoft Flight Simulator.
- Close the TDSGPSManager when you have completed the installation process.
Configuring the GTN Hardware for Use With MSFS:
By default, the GTN750 should appear as COM1 and the GTN650 as COM2 in the connected devices window of the RealSimGear Add-on. When you turn the knobs or press a button, the ‘message’ and ‘command’ sections will change accordingly. Button functions will display when release. When the button is pressed [Unmapped] will be displayed. This is normal behavior.
NOTE: If the GTN650/750 buttons and knobs are not working, please check to make sure the device shows up in the RealSimGear Add-on Device interface and that you have selected the correct GTN Device Type that matches how you have configured the TDSSim or PMS50 GTN. Additionally if you are using the TDS GTNXi, please ensure that you have installed the command mapping file as noted in the "Install RealSimGear Plugin" section above.
-
COM1: Tells the device interface to send commands as a GTN750
-
COM2: Tells the device interface to send commands as a GTN650

Touch screen control with MSFS Pop Out Panel Manager
Currently, Microsoft Flight Simulator does not have a method for direct manipulation of touch screen devices for it's avionics. This will effect your ability to control the G3000 GTC's, GTN 750/650, and G3X avionics in the simulator with your touch screen device.
Fortunately, a community member has stepped in, providing a free to use application for Microsoft Flight Simulator which will allow you direct control of touch enabled avionics. This program is: MSFS Pop Out Panel Manager
With the MSFS Pop Out Panel Manager you can have the mod automatically select, pop out, move, and make full screen, all of the avionics in use with your RealSimGear hardware, this includes the G1000. Additionally this is the only way to use touch screen devices in MSFS.
- Current Version for MSFS 2020: Pop Out Panel Manager for MSFS 2020
- Current Version for MSFS 2024: Pop Out Panel Manager for MSFS 2024
-
Support for the application is provided by the author on the official Microsoft Flight Simulator forums HERE
Note: While we have fully tested the implementation and functionality of the mod, and confirm its compatibility with our devices, RealSimGear will not provide support for direct issues with the mod. This is to be done with the mod author through his discussion forum.
For More Information on how to set up MSFS Pop Out Panel Manager, please see the following help article:
Setting Up Pop Out Panel Manager for Microsoft Flight Simulator
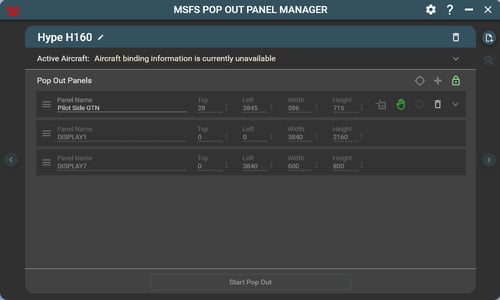
For the GTN750Xi:
These are the preferred pop out settings for width and height on the TDS GTNXi750 pop out: 
Getting Support for TDS Simulations GTNXi Avionics
RealSimGear is happy to help assist in getting your RealSimGear GTN750 and GTN650 working with the TDS Simulations GTNXi Avionics. If you are having trouble even after following our guide above, we invite you to reach out to our support team for assistance.
For assistance with the installation and setup of your RealSimGear GTN devices, please send us and email to: support@realsimgear.com. Let us know where you are stuck and we will be happy to give you an assist.
If you are having issues with:
- Accessing your TDS Simulations Account
- Purchasing the TDS Simulations GTNXi Avionics
- Installation error codes
- General product support for the TDS GTNXi
- Third party aircraft integrations
Please contact the support department for TDS Simulations. There are two ways to get in touch with TDS Simulations:
- TDS Sim Discord: https://discord.gg/NupgPCUgsH
- TDS Sim Support forum: http://forum.tdssim.com/